How To Change Ink In HP Printer

HP printers have revolutionized the way we print, making it simpler and smarter than ever. Wireless printing allows you to print from smartphones or any other device – anytime or anywhere! Their intuitive user interface adds further convenience. To keep your HP printer functioning optimally its maintenance and care must be properly understood – including knowing when it comes time to change out ink cartridges when low – which this comprehensive guide covers.

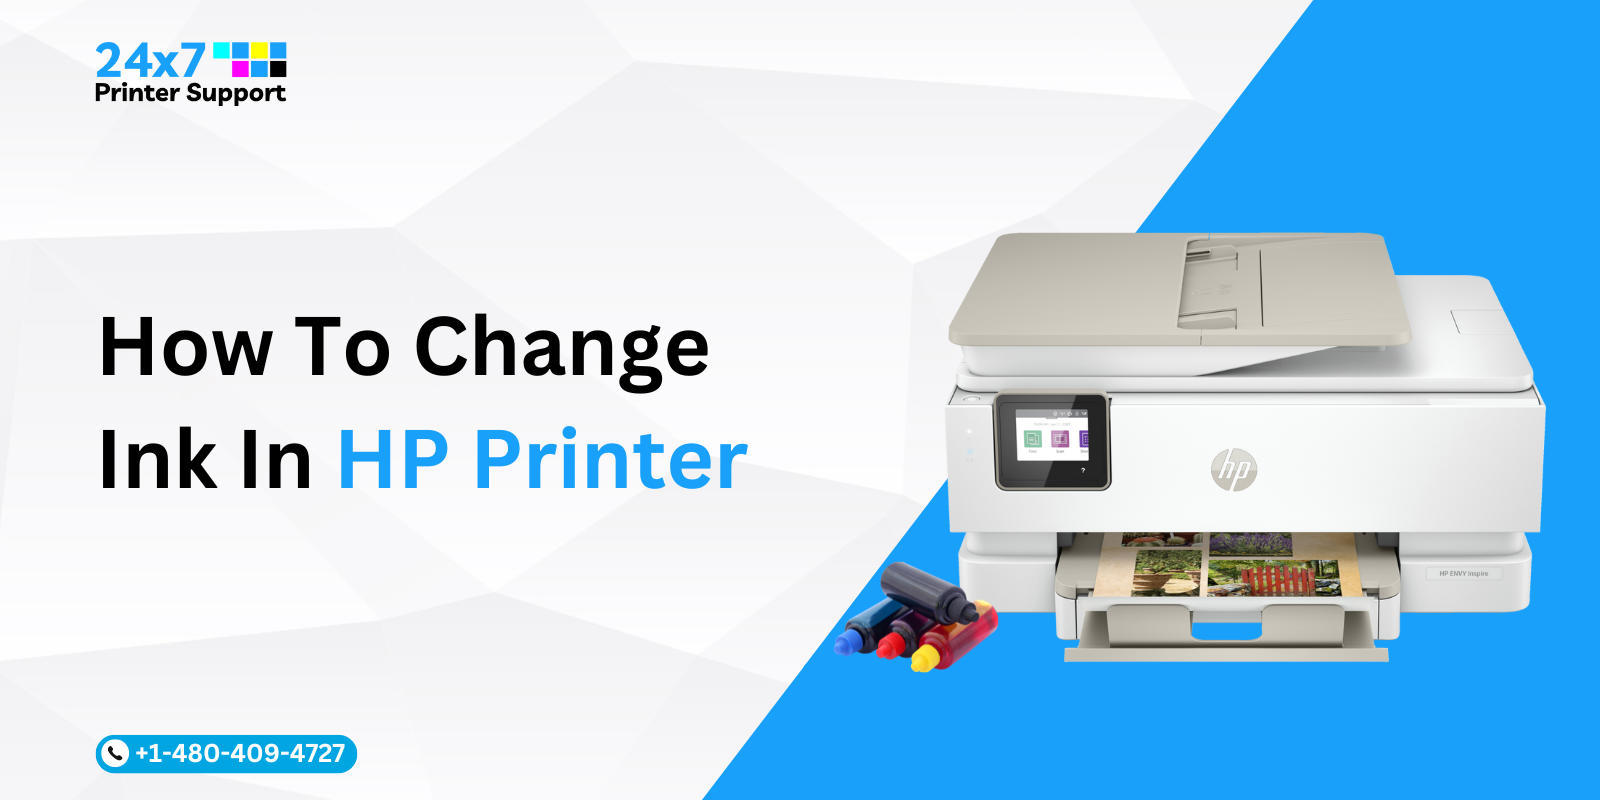
How to Replace Ink in an HP Printer: A Step-by-Step Guide 

With proper planning and preparation, changing ink can be an easy and quick process on an HP printer. This step-by-step guide is here to make the replacement as smooth as possible.

Step 1: Assemble Supplies

To ensure an effective ink cartridge replacement experience, be sure to gather all necessary supplies before beginning. This will allow for efficient cartridge swaps without hassles or complications.

Replaceable Ink Cartridges: To ensure optimal printer operation and print quality, be sure to purchase compatible HP ink cartridges for your model printer. Incorrect cartridges could lead to printing errors or produce poor-quality prints – check your printer manual or cartridge label to be sure that you are using the proper ink.

Lint-Free Cloth: To maintain a printer’s cleanliness and prevent ink stains, using lint-free cloth is key to maintaining its cleanliness and avoiding ink smudges or residue. This will also help ensure its optimal performance.

Small Container: Although optional, having a small container on hand is beneficial in keeping ink leakage at bay and protecting yourself from the potential mess caused by old cartridges that you plan to recycle. It is especially handy for this task!

Read More: Fix common HP printer problems

Step 2: Switch on the Printer

To make sure your HP printer works as intended, turn it on and connect to either a computer or network properly. It must recognize new cartridges once installed if they haven’t yet been seated and initialize them properly if it is unconnected or turned off.

Press the power button on your printer to activate it, then wait until it has fully recharged before using it.

Ensure that your printer is connected via USB or network. You can check its status via either your printer or computer.

Step 3: Open Your Printer Cover

To gain access to the ink cartridges, remove your HP printer cover. How you open it depends on its model number.

Lifting the Lid: For certain models, opening their printer requires lifting its lid to access its ink cartridges. In many instances, parts of the printer need to be lifted to access these cartridges.

Opening a Front Panel. Certain models feature a front panel that needs to be opened, such as a flap or door at the front of their chassis.

If you need assistance in unloading ink cartridges from your model’s printer, consult its manual for specific instructions.

Step 4: Remove Old Ink Cartridges

To install new cartridges, after opening your printer’s cover and waiting a couple of seconds for the ink cartridge to move into position in its proper spot in the middle, open its cover again and wait a couple more until its ink cartridge stops moving forward and becomes stationary in its slot. This may take as little as 15 seconds.

Launch Your Cartridges. Gently press down on each old cartridge to free it; each should easily come out.

Carefully Unscrew Cartridge: Remove the cartridge carefully and store it in an ink spill-proof container or on paper to avoid ink dripping onto nearby surfaces. To maintain optimal printing results and avoid staining of copper-colored contacts or ink nozzles.

Step 5: Prepare New Ink Cartridges

Unpack Your Cartridges By Hand Gently Once removed from their packaging, take extra precautions when handling them to avoid damage to them and ensure maximum effectiveness of their use.

Remove Protective Tape: Carefully peel away any protective tape from copper strips and nozzles without touching them directly as this could affect print quality and ink flow. Dispose of Tape in an environmentally responsible way

Step 6: Insert New Ink Cartridges 

To install new cartridges, place them into their appropriate slot. For color cartridges, this would usually mean placing them to the left, while black cartridges should go into their appropriate right slots.

Securing the Cartridge: Gently press down on the cartridge until it clicks firmly into place; to avoid printing issues, all cartridges must be securely fitted into their slots.

Step 7: Close Your Printer Cover

After installing new cartridges, close the printer cover. Allow several minutes for it to recognize and prepare them for use – your printer may make several noises while it adjusts itself accordingly.

Close the Cover: To prevent errors, always ensure that the cover is closed securely.

Initialization: Allow the printer to initialize the cartridges; this may take up to one minute.

Step 8: Align Your Ink Cartridges

After installation, most HP printers will prompt you to align your ink cartridges for optimal print quality. This step should not be skipped!

Follow the Instructions Provided: Be sure to adhere to any instructions offered by the printer.

If your printer does not prompt you, manually aligning can be done through its control panel or HP software installed on your computer. Please refer to your printer’s user manual for detailed instructions.

Step 9: Print Your Test Page

Once your ink cartridges have been properly aligned, printing out a test page is an ideal way to ensure they have been installed correctly and provide you with quality prints that meet your expectations. Furthermore, this test page can help identify any problems with ink flow or alignment that could hinder their proper function.

Print Command: Your printer or computer’s control panel provides an option to print out a test page; typically located within its settings menu.

Examine Your Test Page: Pay close attention to issues with print quality, such as missing colors or streaks, that don’t meet your expectations on your Test Page. You may need to perform different alignments or clean your printheads if the quality does not meet them.

Tips for Maintaining Your HP Printer

Maintaining your HP printer correctly is key to ensuring consistent prints, prolonging its life span, and avoiding common problems. Here are a few tips that will help keep it performing at its best:

Quality and compatibility: Use Original HP Ink Cartridges:

HP Genuine Cartridges Are Engineered to Perform: HP genuine cartridges have been carefully engineered to work seamlessly with your HP printer and produce vivid, clear prints with each use. Their high-quality ink provides precise results.

Avoid Damage: Non-HP ink cartridges may damage internal printer components by clogging or leaking, leading to costly repairs or replacements of expensive printer components.

Warranty Considerations (HP Cartridges Only)

Coverage: Non-HP cartridges can void your warranty on your printer, and therefore HP requires that only genuine HP parts be used under their policy to cover any repairs or issues with repairs or maintenance services.

Firmware Updates For Better Print Quality And Speed

Regular firmware updates often lead to improved print quality, reliability, and speed as well as new features and compatibility with various cartridges.

Bug Fixes: Regular updates are released to address bugs or any issues with the functionality of your printer, to ensure smooth functioning. Regular updates ensure a better printing experience.

Update Process Automatic Updates: HP printers have the capability of automatically checking for and installing firmware updates; to take full advantage of this setting it must be enabled.

Manual updates can also be installed from HP’s website, keeping your firmware current by regularly checking for firmware upgrades.

Why Clean Print Heads Print Quality Issues If your print quality issues include streaks, missing lines, or faded printouts, this could be indicative of dirty or clogged heads.

Maintenance is key: Regular cleanings, even if no issues appear visible, will help ensure optimal print quality and protect the printer against unnecessary repairs.

Cleaning Process and Tools for Maintenance: HP printers feature built-in maintenance software that can be accessed via their control panels, providing tools that will guide you through cleaning.

Manual Cleaning: Sometimes more thorough cleaning by hand may be necessary; for more information on how to safely perform this operation refer to your printer’s user manual.

Cartridges must be stored safely within their proper conditions of storage; excessive heat or humidity could cause their ink to dry out or discolor over time.

Original Packaging: Keep cartridges protected from light and air exposure that could dry up the ink by keeping them stored in their original packaging until ready for use. This prevents light glare as well as ink drying out prematurely.

Handling Tips

Store ink cartridges away from freezing temperatures to prevent damage to both the cartridge and ink supply. Doing so could potentially void their warranty and render them nonfunctional.

Orientation: Store cartridges upright to avoid an uneven distribution of ink which could diminish print quality.

Regular Printer Use, Use your printer regularly to prevent ink from drying out in its printheads, printing at least one page each week is an effective way of maintaining ink flow and keeping it flowing smoothly.

Dust and Debris Clean Exterior: Use a soft lint-free cloth to wipe down the exterior of your printer, as harsh chemicals could potentially harm its surface.

Internal Cleaning: When performing internal maintenance on your printer, be sure to regularly check for dust and paper debris build-up in specific areas such as around the print head, paper feed area, and paper guide. Any buildup should be removed with a soft bristle brush or compressed air.

Paper Quality

To avoid printer jams and get optimal results, HP recommends high-grade paper for optimal printing results. Paper of lower quality can cause fibers to accumulate inside the printer mechanism, potentially leading to jamming.

Proper Storage of Paper: To prevent curling and moisture absorption, store paper in a dry and cool environment to preserve smooth paper feed without the risk of jamming.

Take these maintenance steps to keep your HP printer in good shape for as long as possible, offering high-quality printing results.

Troubleshooting Common Issues

Printer issues are sometimes frustrating to deal with, but most can be resolved quickly with just a few easy steps. Below are detailed troubleshooting steps for some of the more frequently occurring issues on an HP Printer.

Printer Is Not Recognizing New Cartridges

Check for Protective Tape: If your printer does not recognize new cartridges, be sure to apply protective tape first.

Carefully peel away any protective tapes from cartridges before disassembly begins. Even small bits can block electrical contacts or nozzles and interfere with recognition processes, so be mindful when peeling it away to avoid damaging either element of recognition.

Be sure to thoroughly inspect your cartridges to make sure there are no remaining tape or packaging materials that could be contributing to any issues with them. Hold each one up under good lighting and inspect every angle; holding onto your cartridges allows you to see every element from all directions.

Reinstall the cartridges

Correct Seating: Reinstall and uninstall cartridges as necessary and verify they are seated correctly in their slots – when pressing down hard enough you should hear a click! Poor electrical contact may lead to recognition problems if improperly seated devices.

Slot Alignment: When installing new cartridges into their correct slots (color cartridges on the left and black cartridges on the right), ensure they are placed properly as this could damage your printer if they are misaligned.

Restart Your Printer

Power Cycle: Disconnect the printer for several minutes to let it reset completely and eliminate any temporary errors or memory glitches that might be hindering its proper function. This should give the printer enough time to properly reset itself, clearing away temporary errors or glitches from its memory system and returning to proper working condition.

Connect the printer back and restart it; clearing its memory can help resolve issues with recognition. Allow the printer to complete its startup procedure before testing cartridges.

Check Cartridge Compatibility:

Verifying Your HP Printer Cartridges: Double-check that the cartridges you’re using are compatible with your HP printer model to avoid recognition issues and subpar print quality. Compare their model numbers against those listed in your printer manual or online at HP’s site to confirm.

Firmware Update: Updating the firmware of your printer to its most up-to-date version can help resolve bugs and improve cartridge compatibility, as well as ensure timely download and installation from HP’s website. Regular firmware upgrades will enhance performance while adding new features.

Cartridge Contacts: Gently clean cartridge contacts using a soft lint-free cloth or cotton swab moistened with distilled water to reach all corners of the printer and clean all contacts inside it. Allow these to dry thoroughly before reinserting cartridges – any moisture could compromise performance! Additionally, avoid harsh chemicals that could potentially damage contacts.

Poor Print Quality

Automated Cleaning Cycles: For optimal printing quality, run an automatic cleaning cycle using either software or a control panel on your printer to clear any clogs from its print heads and improve print quality. Referring to user guides can help initiate this cycle.

Repeat as Needed. Additional cleaning cycles may be required to successfully clear the nozzles, so repeat it if your print quality doesn’t improve after the initial cycle. Remember, excessive cleaning cycles can use up much printer ink!

Check Cartridge Levels: Ink levels should always be checked as low levels may result in faded or streaked prints. You can do this through either your printer’s control panel or HP software installed on your computer.

Replace Cartridges Low on Ink: To restore print quality and prevent unexpected depletion of ink during critical print jobs, consider replacing cartridges that have low ink levels by switching them out with new cartridges with high levels. Monitor ink levels closely so no unexpected drops occur during essential jobs.

Aligning Print Heads: Alignment Procedure: For best results, utilize the software on the printer to properly align its printheads. A misalignment could result in prints being distorted or blurry due to misapplying ink onto paper; by having aligned printheads the ink will be distributed correctly onto it.

To achieve accurate results, carefully follow the onscreen instructions. Aligning can begin either from the printer’s control panel or the HP software installed on your computer; regular alignment checks can ensure high print quality.

Check Paper Quality:

Print quality can be compromised by using subpar or inappropriate paper for your printer, such as thin or rough textured types that might hinder output. High-quality papers tailored specifically to each printer can improve output significantly.

Paper Storage: When it comes to paper storage, keep it dry and cool to avoid moisture absorption that could result in paper jams or poor print quality. Keep paper in its original package until ready for use, avoiding environments that are either too humid or dry as this could affect its integrity.

Print Head Maintenance

In case automated cleaning does not resolve the problem, manual cleansing of print heads may be necessary. For instructions on this matter please consult your printer manual; be sure to follow all safety precautions and use only recommended solutions when cleaning manually. While manual cleansing can be more thorough it should also be completed carefully to avoid damaging print heads.

Replace worn-out print heads: If printing quality issues remain after cleaning, it could be that your print heads need replacing. HP Support or your printer’s user manual can offer instructions on the appropriate procedure to follow for replacing them; their lifespan can also be extended through regular use and care of the device.

Check for software issues:

Driver Updates: Make sure that the most up-to-date printer drivers are installed, as outdated ones could result in print quality issues. Download HP’s website to find their most up-to-date drivers regularly as this can improve compatibility, performance, and reliability.

Reinstall drivers: If the issue persists, uninstall and reinstall your printer driver to eliminate any conflicts between versions and ensure they match your operating system. Reinstallation may help correct corrupted or incorrectly installed ones.

Paper Jams and Feeding Issues

Clear Paper Jams: For any jammed papers inside the printer, gently remove them with both hands until all pieces of torn paper have been extracted from their binders. Check all doors to identify any remnants by opening them, while pulling all paper evenly using both hands.

Examine All Areas: To prevent jams, inspect the output tray, paper tray, and feed rollers regularly using a flashlight if necessary to check for obstructions in the output tray, paper tray, or feed rollers. Regular checks can help avoid unexpected jams!

Select the appropriate paper size and type

Load the paper correctly: it should match your print job settings. Misalignment between paper size and type could result in jams or incorrect prints; HP recommends choosing an option specific to your printer model.

Adjust Guides: To prevent the paper from skewing, adjust the paper guides so they fit snugly around the paper edges. A wrongly set guide could cause inadvertent paper feeding which leads to jams; regularly inspect and adjust guides to ensure consistent performance.

Maintain the paper feed rollers

Dust and Debris: Use a dampened, lint-free cloth to wipe down paper rollers with dampened water to eliminate dust, debris, or any other particles that could be causing issues with paper feeding. Please be gentle to not damage them as dirty rollers may result in paper misfeeds.

Maintenance: Cleaning should be performed regularly to reduce future jams. Keep the rollers wiped down for smooth paper feeding and reduced risk of jamming; your manufacturer will recommend an optimal maintenance schedule.

Assuring the consistent performance of an HP printer over its lifespan requires regular maintenance and troubleshooting to identify common problems quickly and resolve them as soon as they arise. Doing this will not only increase its lifespan but will also enhance the printing experience by producing higher-quality prints while decreasing downtime. These guidelines will assist with this goal.

Read More: HP printer setup with expert help

Conclusion:

Follow these tips and steps to maintain the performance of your HP printer. Ink cartridges must be handled carefully and regularly maintained to guarantee quality documents. Once you follow all these steps, you no longer need to worry about the issues. In case you find it difficult to change ink in your HP printer, you can simply get in touch with the customer support team. The reliable team can assist you with any kind of issues you are facing with the printer. Hopefully, all your issues are resolved. Happy printing!

Call Us For Instant Solutions

Don’t Let Printer Problems Hold You Back!

Author – Franklin

Franklin is a seasoned content writer with 10 years experience in technology and business content across multiple formats. He leverages his skills in crafting curated content on the printer issues and solution. In his personal time, He enjoys reading article and being up-to-date on trends in technology and business ecosystem.

Steps to Fix HP Printer Driver Error on Windows PC

This error message is often frustrating for HP printer owners on Windows PCs. The error usually occurs when Windows has trouble loading the printer driver. It could be due to either outdated software or an incomplete printer installation. This problem can be resolved in various manners. The HP printer error can be fixed easily with the following step-by-step process on Windows 10 or 11.

When does the “Driver is Unavailable” error occur?

Users of HP printers using Windows PCs may find the “Driver Is Unavailable” error frustrating. This annoying message appears when Windows has trouble loading the printer driver for HP devices. This error can occur in several different scenarios:

  1. Outdated Driver Software: Over time, printer drivers can become obsolete, either because they are not updated by the manufacturer, or due to compatibility issues. Windows may not connect to the printer with an outdated printer driver. This will result in the error “Driver Is Unavailable”.
  2. This error may also caused by an incomplete printer set-up. It could happen when the printer was not configured or installed properly during the initial setup. Windows might struggle to find the printer driver in such cases. This can lead to an error message.
  3. Corrupted driver files: Due to malware infections or software conflicts, driver files may become corrupted, and Windows may no longer access necessary driver files when this occurs, leading to the “Driver Is Unavailable” error message.
  4. Operating System Issues: Your printer driver might no longer work correctly with the version of Windows you are currently running, such as when updating or installing major updates to your operating system or software updates. In such an instance, existing printer drivers might no longer be compatible with these changes, leading to driver-related problems and further complications.
  5. Hardware issues: Error “Driver not available” may occur due to hardware connectivity problems. This could involve anything from USB cables and network connections to Windows reporting that no driver was found for a printer and creating stable network connections that the OS cannot detect or establish itself. You can learn more by clicking here and running the printer troubleshooter tool. 

Solutions

1. Run the printer troubleshooter

Windows includes an inbuilt printer troubleshooter which can help address many printer drivers and related printer issues. To use it: hold down Windows Key + S and press Enter, type Troubleshoot Settings into the Settings window; choose Other/Additional Troubleshooters from that drop-down list, and then find and run Printer Troubleshooter to complete its operation.

Follow the onscreen instructions to fix any problems identified by the Troubleshooter. 

2. HP Print and Scan App

HP offers a special app known as HP Print and Scan App, intended to detect and fix issues with HP printers. To use it effectively:

HP Print and Scan Doctor can be downloaded directly from HP’s website and used with their Printer Diagnostic Tool to quickly diagnose problems with your printer. With its advice and suggestions for fixing detected issues, use HP’s HP Printer Diagnostic Tool for diagnosis.

3. Update your HP printer

Install the latest driver and software updates for your HP printer. Search for your HP Printer model on HP’s Software & Driver Downloads Portal and download the recommended updates.

You can manually update drivers through Device Manager if you have problems using HP’s Driver Updater Tool.

  • Type devmgmt.msc in the Run box by pressing Windows + R.
  • Right-click on your printer hardware and choose Update driver.
  • Update the driver by following the instructions on the screen.

4. Install the latest Windows updates

Update your Windows OS. Older versions of Windows may not be compatible with HP printer driver software. How to update Windows

  • Select Settings > Windows Update from the Start menu.
  • Install any available updates.
  • Install any optional printer updates if they are available.

5. Install Drivers for HP Printers Again

If the problem persists, remove the printer and add it again to your computer.

  • Go to Bluetooth & Devices > Printers & Scanners in the Settings app.
  • Remove your HP printer.
  • Uninstall the HP printer by expanding Printer queues in Device Manager.
  • Install any HP drivers and support software via the Apps & Features menu.
  • Restart your computer, and then reinstall the HP driver and software.

6. Generic Printer Driver

As a possible workaround, consider switching to a generic driver:

  • Update the driver by opening the Device Manager and selecting the HP printer that is not working.
  • Select the generic software device and browse for drivers on your computer.
  • Install the generic driver for your printer.

7. SFC Scan and DISM Scan

The “Driver Is Not Available” error can also be caused by system file corruption. Use the System File Checker and Deployment Image Service and Management (DISM), to fix this error.

  • Execute the command sfc/scannow by right-clicking on the Start button and selecting Windows PowerShell/Terminal as an administrator. 
  • Next, use DISM with the command DISM.exe /Online /CleanupImage /Restorehealth to use its tool.

Conclusion

These steps will assist in fixing the “driver not available” error for HP printers connected to Windows PCs. You can avoid driver-related issues by systematically addressing and troubleshooting potential problems.

Call Us For Instant Solutions

Don’t Let Printer Problems Hold You Back!

Author – Franklin

Franklin is a seasoned content writer with 10 years experience in technology and business content across multiple formats. He leverages his skills in crafting curated content on the printer issues and solution. In his personal time, He enjoys reading article and being up-to-date on trends in technology and business ecosystem.

Fix HP Printer Issues- An Ultimate Troubleshooting Guide

Printers can be used both personally and professionally, and HP printers are among the many available choices, known for their reliability and unique features. As with any electronic device, however, HP printers may occasionally malfunction; whether that means printing incorrectly or having difficulty connecting can be highly irritating. This guide aims to assist in solving these problems quickly. You can get all the hp printer troubleshooting steps in the article. If you still find issues, contact the hp printer troubleshooting phone number

HP Printer Issues:

HP Printer Not Printing

You could find yourself facing incomplete tasks because of the HP printer not printing anything. Your HP printer does not respond to print commands, leading to incomplete tasks. The work being left undone due to various causes ranging from hardware/software conflicts or connectivity issues. This is one of the major hp printer problems.

Connectivity Issues 

Loose Cables: Check to make sure all cables, such as data and power cords (like USB or Ethernet) are securely fastened on both ends to prevent communication from breaking down between your printer and computer. A loose connection could compromise this connection and interrupt communications between them.

Problems with Wi-Fi networks: It is essential that your HP printer connects to an appropriate Wi-Fi network and works properly in order to avoid communication difficulties between it and your computer. Signal interference or network configuration problems could impede these efforts.

Outdated Printer Drivers: Your printer drivers might not be compatible with your operating system or other applications on your computer, which could cause communication problems and hp printer faults. For optimal results, download and install the most up-to-date drivers available for your model of printer, operating system, and HP website.

Paper jams or low ink levels:

Paper Jams: Paper jams can occur due to incorrectly loaded papers, damaged rollers, or foreign objects blocking the paper path. Remove any jammed papers and make sure the tray is loaded appropriately with papers to deal with the hp printer trouble.

Read More: Fix Printer Paper Jam

Low Ink Levels: Low toner or ink levels can be the cause if the HP printer does not print. So, you need to replace cartridges. Check ink/toner levels on either your control panel of the printer or the software installed on the computer.

Printer offline fix hp

It can be perplexing to notice your HP printer has entered an “offline status,” even though it appears physically connected and powered up. This indicates a communication issue between your printer and computer/network.

Problems With Network 

Wi-Fi connectivity: Make sure that your printer is properly connected to the Wi-Fi network, as connectivity issues could be due to signal interference or weak WiFi signals.

If you are using an Ethernet cable, make sure both ends are securely attached and that both printer and computer network ports work optimally.

Printer settings may be incorrect:

IP Address Configuration – Be certain the printer IP address matches up correctly with your network settings to avoid communication problems between it and a computer or network. An improperly set up IP address could prevent communication from taking place between printers and computers or networks.

Driver Compatibility: Outdated printer drivers could cause communication problems between your computer or network settings and the printer. To update them to their most up-to-date versions on HP’s site, download new printer drivers now!

Poor Print Quality:

It can be frustrating when your HP printer prints don’t meet expectations, signaling an underlying issue that affects print quality. Poor print quality may be caused by any number of factors and needs further investigation in order to hp fix printer.

Low Ink or Toner Levels:

Fading or streaky prints could be caused by low levels of ink or toner in your cartridges; replace any necessary cartridges before checking this issue through your printer’s control panel or software on your PC.

Clogged printheads:

Over time, printheads may become clogged with dried ink and debris which compromises printing quality. To maintain optimal printing results, run your printer’s printhead cleaner to remove obstructions and improve printing quality.

Misleading Print Settings:

Paper Type and Setting Quality: For optimal printout results, ensure that you use the appropriate paper type and setting quality in your printer’s print dialogue box or settings menu. Failure to do so could result in blurry or inconsistent printouts.

Paper Jams:

HP printer users often experience paper jams as a frustrating but common occurrence. By taking preventative steps against paper jams and understanding their causes, more printing problems may be mitigated.

Mishandling Paper Load:

Align Paper Correctly – When loading paper into paper trays, make sure it is perfectly loaded to ensure its edges align properly and the stack height does not surpass what is indicated by tray guides.

Paper Quality: For optimal printing performance, always select paper of the highest quality that has not been damaged and meets the weight and size specifications recommended for your printer model.

Damaged rollers or obstructions:

Roller Inspection: Examine the rollers that feed paper into your printer for signs of damage or dirt build-up. For optimal cleaning results, use a dampened lint-free cloth dampened lightly with isopropyl or water to clean them thoroughly.

Obstruction Removal: Locate and clear away foreign objects and debris that are impeding paper’s progress – for instance torn or misplaced paper pieces and any other obstructions such as shoes.

Install and Set Up a Printer:

Installing or reinstalling an HP Printer can be challenging for those without technical knowledge, particularly those without much patience. To successfully overcome any challenges during the hp printer setup and installation, patience, attention to detail, reliable resources, and guidance will all help to overcome any hurdles or roadblocks.

Problems connecting to computer or network:

Connect the printer using the instructions found in its user manual or installation guide.

Visual Aids: Take advantage of the diagrams and illustrations in the setup guide for visually identifying and connecting all necessary cables and components.

HP provides various online resources, such as interactive guides and video tutorials, that help facilitate printer installation.

Wireless Configuration.

Wi-Fi Setup Wizard: Navigating to the wireless settings section on your printer control panels and opening its Wi-Fi setup wizard can make setting up wireless networks easy.

Entering your SSID and Password: When prompted by the wizard, provide your printer’s SSID or network name as well as its password so it can connect to Wi-Fi networks.

Wireless Security Settings: To ensure a safe connection, make sure that your printer’s wireless settings, including encryption type and security keys, match those of its Wi-Fi network.

Install compatible printer drivers:

Download Drivers from HP Website: Access HP’s official website to access and download the most up-to-date drivers for your printer.

Installing drivers on your computer is a straightforward process: run the driver installation files and follow the onscreen instructions to complete it. After completion, reboot your system so that all changes take effect effectively.

Automatic Driver Updates – To make sure that you always have access to the most up-to-date compatibility and software patches on your computer, set automatic updates of driver software. This will guarantee the latest compatibility and software enhancements.

Basic Troubleshooting of HP Printer Issues: 

Check Connections 

Make sure that the cord is properly connected to both your printer and a working power source, and that any damaged connections have been replaced as soon as possible. If necessary.

Plugging another device into the power strip will confirm its output.

Check Data Connections: Take care when inspecting any USB or Ethernet data cables connecting the printer to the computer or network, to make sure they are securely fastened at both ends and free from damage.

Check the ports on both your printer and computer to ensure there are no bent pins or other debris obstructing the connection.

Restart Printer: Watt Cycle Button To turn off the printer, press and release its Power Button before unplugging both its Power Cable from its socket as well as from its printer. When finished powering down, unplug both immediately.

Wait at least one minute, in order to allow any residual power and reset all internal components of the printer.

Simply connect the printer’s power cord to the outlet and then activate it using its power button.

Resetting will often improve the performance of the printer.

Update Drivers Visit HP Support Website

For Driver Updates, browse directly to HP Support’s official website with your web browser.

Enter the model number of your printer or select it from a list to locate its driver and software for that model.

Download the latest drivers:

Select the driver version compatible with your operating systems.

Choose drivers suitable for both the model of your printer and the version of the operating system you use.

Install the Drivers

To install your drivers on your computer, run the installer and follow its instructions on the screen.

After your installation is complete, reboot your computer in order to ensure that the changes take effect properly.

Issues With Connectivity

Check Wireless Settings: Assure that your printer is connected to the appropriate Wi-Fi network by checking its control panel or menu settings.

Make sure the SSID and password of the network have been entered accurately, and ensure your printer falls within its range of the wireless router.

Reboot Your Router Or Access Point If Multiple Devices Are Experiencing Issues, Reboot Your Wireless Router/Access Point

Wait at least 30 seconds before plugging the cord back into your router.

After restarting your router, check that your printer can successfully access the wireless network.

Connect Your Printer / Check For An Issue

In order to identify potential problem ports, connect the printer to another USB port before testing any potential potential bad ones.

Make sure the USB port is undamaged and capable of providing sufficient power to the printer.

Cable Inspection: Scan your USB cable for signs of damage such as fraying wires or exposed conductors.

If the USB cable appears damaged, be sure to replace it as soon as possible to ensure a steady connection between your printer and computer.

Print quality issues: Before testing print quality issues, first check ink or toner levels:

Checking Ink/Toner Status:

You can quickly and easily check how much ink or toner remains using either the control panel on your printer or software installed on your computer.

To maintain consistent printing quality, replace cartridges when they become empty or low according to your printer’s instructions.

Genuine Supplies

Always choose authentic HP toner or ink cartridges as these can produce the highest-quality printouts. Third-party cartridges may cause print quality issues.

Avoid compatibility issues by only purchasing cartridges compatible with your printer model.

Conduct a Print Head Cleaning: Printer Maintenance

Most HP printers include options to clean the print heads as part of their maintenance menu.

Use a print head cleaner to clear away any ink or debris that might be hindering your printing quality.

To start the cleaning process, it may be necessary to choose specific options on a control panel or software interface.

Paper Jams:

Clear Paper Path and Perform a Printer Inspection By opening up your printer doors, carefully inspect its paper path.

Use a flashlight if needed to locate small pieces of paper that might be blocking the path of your paper.

Manual Removing. When pulling away from paper with both hands, pull in the direction that it moves.

As even small pieces can jam your printer and damage its internal components, it is best to avoid tearing paper.

Check Rollers

Roller Cleaning: For optimal cleaning of the paper feed rollers in your printer, damp a soft cloth lightly with isopropyl or water and use this solution to gently scrub them clean.

Gently wipe the rollers to remove any dust or dirt that could impede paper-feeding issues.

To avoid moisture-induced damage, always ensure the rollers have completely dried before installing them.

Install and Configure a Printer

Follow the setup instructions.

Consult Your User Manual For detailed instructions on installing and setting up the printer hardware, referring to the HP Printer User Manual can be beneficial.

The manual provides step-by-step instructions on how to unpack, install ink cartridges, and connect your printer to either a network or computer.

Software Installation:

Follow the instructions included with your printer to install its software and drivers correctly.

Follow the onscreen instructions to complete your installation.

Utilize Installation Software:

Utilize the HP Smart App on tablets and smartphones for quick, effortless installation of HP smart products.

This app provides hp deskjet 2755e troubleshooting and guided instructions to connect an HP printer to a wireless network and install any necessary software onto your computer.

Contact HP printer support for Help

Don’t fret if, after following all the steps to troubleshoot your HP printer, and still experiencing issues. Get their full support by following these steps:

HP offers an abundance of online resources for hewlett packard printer troubleshooting. From troubleshooting guides, FAQs, and knowledge base articles – these resources provide answers to common inquiries as well as specific troubleshooting methods tailored to each printer model.

Join the HP Community Forums

Connect with HP printer experts, users, and HP professionals through HP Community Forums to share experiences, seek advice, and overcome similar obstacles together. These forums offer support from other users as well as crowdsource solutions.

Customer Support Channels:

HP offers tailored support through multiple customer service channels to address printer issues quickly and effectively. HP provides email, live chat, and telephone assistance from trained professionals available 24/7/365 – assuring tailored solutions tailored to each printer problem you encounter.

Phone Support:

HP customer service offers hp printer support customer service number as the quickest and most effective method to reach out for assistance. Just dial the listed phone number on their website, and a knowledgeable representative can guide you through hp envy 6055e troubleshooting, provide technical support as necessary, or start a service request as necessary.

Service Options

HP offers a range of hp printer repair and replacement options, as well as on-site printer maintenance to keep your printer functioning optimally. HP technicians will arrange an appointment at your convenience should it be necessary.

Remote Assistance

HP support offers remote assistance as a service to diagnose and resolve printer-related issues remotely. A technician can remotely view all settings and configurations on your printer through secure remote access, providing guidance during troubleshooting or making adjustments necessary to resolve it.

HP Offers Ongoing Assistance: Their commitment goes far beyond initial troubleshooting assistance; should any follow-up questions arise or problems reoccur after seeking aid, HP will offer support as necessary.

HP customer support services aim to give you peace of mind, making sure that you don’t face ‘hp printer not printing from computer’ issue. Do not hesitate to reach out if there are any issues with your HP printer – HP’s experts are at hand to assist in overcoming obstacles so you can resume printing smoothly!

FAQ

1. How Can I Clear Up Paper Jam in My HP Printer

If your HP printer experiences a paper jam, to prevent damage you should immediately switch it off and follow the instructions provided in its user guide to remove it. Be careful when handling and handling paper as this can tear easily resulting in further problems for both printer and user alike. When buying paper for use in your HP printer only use recommended paper to reduce chances of jamming or clean the rollers of its paper feeder with a lint-free cloth and mild cleaning solution regularly to prevent future jams.

2. My HP printer prints slowly.

There are a few steps you can take to speed up your HP printer, including reducing print quality settings without compromising too much print quality. Also, ensure your driver is up-to-date by downloading new drivers from HP’s website, and switching from WiFi to USB connections for quicker data transfers if your print jobs are large.

3. How can I improve the print quality of my HP printers?

Before setting out to improve the print quality of your HP printer, inspect its cartridges. For vibrant and accurate colors, replace any empty or low cartridges as soon as they become low or empty; also select the highest print quality from the menu when printing images or documents to get sharper prints. Regular maintenance of printheads on your printer is key to maintaining consistent print quality; cleaning them regularly is recommended in order to remove dried ink and debris that could impact color accuracy or print clarity.

4. I’m having issues with my printer; what should be my error code?

Error messages displayed on your HP printer could indicate low ink levels, paper jams, or connectivity problems. Review the information displayed to identify any specific issues; for instance, a paper jam may require gently unplugging it according to instructions of your printer; check that all ink cartridges are installed properly and have enough ink; to address specific errors follow either your printer manual or on-screen instructions.

5. How can I resolve driver issues on my HP printers?

Start by uninstalling your existing HP printer driver from your computer, then visit HP’s official website to download updated drivers designed specifically for your printer and operating system. Installing current driver updates ensures optimal printer performance and compatibility with computers; while keeping operating system versions updated also facilitates seamless communication between HP printers and computers – and reduces driver-related problems in general.

Conclusion 

HP printers can be reliable devices with many features, but they’re not immune from hewlett packard printer problems. You can address printer-related issues by following this guide’s troubleshooting instructions and consulting hp printer troubleshooting phone number as needed.

Maintain your printer to achieve maximum performance and longevity by cleaning it regularly, installing genuine cartridges, updating drivers and software, and fixing any potential HP printer issues that arise. Enjoy high-quality printing for years.

Call Us For Instant Solutions

Don’t Let Printer Problems Hold You Back!

Author – Franklin

Franklin is a seasoned content writer with 10 years experience in technology and business content across multiple formats. He leverages his skills in crafting curated content on the printer issues and solution. In his personal time, He enjoys reading article and being up-to-date on trends in technology and business ecosystem.

Troubleshooting HP DeskJet 3755 Not Printing issues

If you’re using HP’s DeskJet 3755 printer, it typically operates smoothly. However, occasionally, issues can lead to frustration. This guide will help in identifying and fixing the problems.

Despite HP’s reputation as a manufacturer of superior printers, customers might sometimes encounter printing issues using this model. In these instances, it’s crucial to identify the problem before attempting to find solutions. So you’ll be able to resume printing important documents with ease.

Numerous factors can cause issues when printing. This article will explain the reasons behind the printing printer’s problems and suggest ways to correct the problem. If you’re not sure about the right steps, do not hesitate to seek assistance from a qualified professional.

Common reasons why the DeskJet 3755 Printer is not printing

Paper Jams: Sometimes, papers can get stuck inside the printer. This is usually because of a wrong paper type or overload tray. To resolve this issue, be sure to carefully take out the jammed paper, and refill it correctly.

Problems with connectivity: Your printer may be struggling with connecting to the Internet or a network, because of incorrect port settings, loose cable, or issues with network configuration.

Old or damaged printer drivers: Printer drivers allow communications between your printer and computer. If they are damaged or outdated, they could cause printing issues. The drivers’ up-to-date version will help to resolve these issues.

Low levels of Ink or Toner: Insufficient ink or levels could result in weak or non-existent prints. Make sure to replace empty cartridges or refill the ink/toner for printing to regain functionality.

Hardware Issues: Sometimes components of printers such as rollers and print heads could fail. Expert assistance is often required to resolve these issues efficiently.

Steps to Fix the Printer

Below are the steps you need to follow to help troubleshoot and solve problems with your HP DeskJet 3755 Printer:

  • Verify Connections: Make sure that the printer has been properly powered up, with all of the lights that indicate the status of the operation.
  • Get rid of paper jams: If your printer is experiencing problems with paper jams, you can gently lift the cover of your printer and then carefully take out any paper. Be careful not to risk cutting the paper and damage to internal components.
  • Update Drivers for Printers: Visit HP’s website and search the Support section. Find the latest driver for your printer suitable for your DeskJet 3755 model, and then download the drivers onto your computer. Follow the instructions to install the latest drivers to ensure seamless communication with your printer and computer.
  • Refill Ink and Toner Cartridges: Examine the level of toner or ink on the control panel or through the software installed on your PC. If the levels have dropped or are depleted replace the cartridges by purchasing new ones that work for the DeskJet 3755 Model. Follow the instructions of the manufacturer to ensure proper installation. This will prevent any spills or smudging.
  • Perform Printer Diagnostics: Built-in HP diagnostic tools help you diagnose and resolve any hardware issues that your printer could be experiencing. Diagnostics can help identify problems with parts like printing heads, rollers, or other internal mechanisms. Follow the instructions that are provided in the software to resolve the issues that are identified.

Contacting Customer Support Team

If you contact HP’s customer support team for help regarding their DeskJet 3755 Printer, you will get so many support options that are customized to meet your requirements:

24/7 Support: No matter the day or time HP’s customer support staff are available around all hours to answer your questions and offer support. If it’s the early morning hours or late night it’s possible to count on quick assistance.

Personalized Support: Every customer’s needs are unique and HP’s customer support team is aware of this. If you contact customer service, you can expect individualized assistance tailored to your printer issue. The customer service representatives will be sure to hear your needs, examine the issue thoroughly, and give you individualized suggestions and solutions.

Advanced Troubleshooting: Alongside the basics of troubleshooting techniques described within general guidelines, HP’s Customer Service team can provide advanced methods for troubleshooting. These advanced methods dig further into the root of the problem and offer specific solutions to tackle complicated issues efficiently.

Remote assistance: In some situations, Customer Service might offer remote assistance. If you are a customer, the service representatives can remote access the printer, solve issues, and diagnose them directly. This method will eliminate the need to make personal service calls and permit rapid and effective resolution of technical glitches.

After-sales Support: Customer satisfaction is primary for the customer support team. Once they have resolved your printer’s issue They will follow up with support to ensure the problem has been resolved and that the DeskJet 3755 printer is operating properly. 

Conclusion:

Finding the root of the issue and taking the appropriate steps will usually result in swift solutions. However, if you are not able to solve the problem yourself, contacting HP’s customer service department for professional assistance is a reliable option.

Call Us For Instant Solutions

Don’t Let Printer Problems Hold You Back!

HP Officejet 4630 setup guide for Mac and Windows

Your printer is not only a device but beyond it. It prints all your documents without any hassle. 

You may find many printers in the market, but the question is which is best for Mac and Windows.

People always look for guidance on setting up the HP Officejet 4630 printer. 

Don’t worry! 

You do not need technical knowledge to set up the printer with Mac and Windows devices. You have navigated to the right place.

This blog will show you different ways to set up the HP Officejet 4630. From unboxing to downloading, everything is a cakewalk. So, get ready to install your printer at home with our guidance.

In the contemporary world, everything is online, yet we need hard copies.

Your printer does everything for you. Imagine your boss is asking for a hard copy of a presentation, or you have to send a letter to the client. Having a good printer is like a blessing.

It comes with all the cool features of HP Officejet 4630 that make your life easier. Your boss is happy because you accomplish your tasks on time.

Ready For a Smooth Printing Experience? Let’s get started.

Install Your HP Officejet 4630 Printer Right Away

Step 1: Start unboxing Your Printer

  • Unbox the printer.
  • Remove all the packaging tapes and materials.
  • Place the printers on a clean and flat surface.
  • Take out all the objects from the box, including ink cartridges, USB cables, and a printer instruction manual.
  • Plug the printer into the main outlet and turn it on.
  • Go to the control panel of your printer.
  • Set the language, region, time, and date.

Step 2: Setting Up Hardware

  • Open the ink cartridge box.
  • Insert the ink cartridge into the printer.
  • Load the A4 Paper into the input tray.
  • Then, connect all the wires to the printer and the device.

(You can also check the HP Officejet 4630 printer manual.)

Step 3: Setting up the Connection

Ensure that the printer is compatible with the USB connection and wireless connection.

If the printer is compatible with everything, here you go:

  • Connect the printer with your computer and WiFi, either with or without USB
  • If you want to connect the printer to device wireless, here is what you need to do:
  • Go to the Printer Control Panel.
  • Go to Wireless Setup Wizard.
  • Search for WiFi.
  • Connect the printer using the USB cable with the WiFi.
  • Make sure that the printer and the device connect to the same WiFi.

How To Connect Your Printer to Windows?

  • Go to the search bar. 
  • In the search bar, add Printers. 
  • Then, a window will pop up on the screen. 
  • Select the printer you want to add. 
  • Go to Add a Network Wireless or Bluetooth Printer. 
  • Click on Use Existing Port.
  • Then, click Next. 
  • If the printer connects to the device through USB, choose Local Printer Option. 
  • Choose the Printer Name.
  • Click on Next. 
  • A new dialogue box opens up. 
  • Install the printer driver. 

How to Connect Your HP OfficeJet 4630 Printer to Mac?

  • Go to the setup page.
  • Open the wireless menu bar.
  • Click on Wireless Setup Wizard

(You will get a list of wireless networks on the screen. Choose whichever yours is.)

  • Now, your printer gets connected to the Wireless. 
  • Install the driver for the Mac. 
  • Enter the WEP password.
  • Test the printout report to check if the printer is working. 

How to Download HP OfficeJet 4630 Printer Driver?

Visit the official HP website

  • Find your operating system
  • Download the appropriate driver for your operating system 
  • Open the download folder 
  • Double-click the recently downloaded file.
  • Click on the HP OfficeJet 4630 Printer Driver installation. 
  • Follow the on-screen instructions. 
  • Restart the device and start printing. 

Finding the appropriate support for your printer

We understand the challenges of finding the appropriate technical support you need when the printer doesn’t connect to a device, it gives you a headache, and we solely agree to that discomfort. 

Even the blogs and articles online have technical jargon that makes one whine. Whenever you look to fix your printing issues, you end up googling for other searches, too. It wastes too much of your time, and ultimately, there are no results. 

If you have been looking for someone to help you with technical solutions, 24×7 printer support is here. We help you fix your printer issues at a go. 

Whether it is about connecting your printer to a device or printer offline error, we have the solution for everything. Our experts have served more than 500 clients worldwide instantly. Our technical team has expertise and has served in the printer industry for over a decade. 

Fix your printer problem instantly.

Call Us For Instant Solutions

Don’t Let Printer Problems Hold You Back!

Your Go-To Guide on the HP Officejet Pro 8210 Setup 

Have you been looking for a printer model that solves all your issues? Numerous printer models are in demand, but which one will serve your purpose?

Well, that’s for you to find out.

But if you have been using the HP Officejet Pro 8210 printer, you have selected the best printer of all time. Akin to other printers, this model has complexities; you cannot avoid that.

So, 24×7 Printer Support is here to help you set up your HP Officejet Pro 8210. The setup process is straightforward; any non-technical geek can do this. We do not use technical jargon; people of any age can understand the language. In the following, we have listed the steps to follow the HP Officejet Pro 8210 setup steps.

You do not need to be a technical expert to understand the steps. Follow the steps mentioned 

below and start seamless printing right away.

#1: Connect the HP printer to the Windows PC.

#2: You can use the USB cable to connect the printer to the windows.

#3: Switch the power supply to turn the printer and the PC on.

#4: Go to the settings. 

#5: Then, go to Devices.

#6: Now, click the + button to add a printer or scanner.

#7: Then, check the number of printer models. 

#8: Select your model. 

#9: Connect the printer model to your PC. 

You will see that your printer status is showing online. 

Now, start printing seamlessly. 

The best part about using the HP Officejet Pro 8210 is its seamless functionality. The smooth setup process helps the user. The setup process is easy to navigate with the appropriate steps. There are times when the user may encounter issues.

For instance, paper jams, ink cartridge problems, and connection issues are problems. Other issues include incompatible software or hardware problems, like damaged printers. 

Besides, these are frequent problems that any user faces. So, if you are also facing the same issues, don’t fret.

We are here to help you. We will look at some common printer problems with the HP Officejet 

8210 setup and help you fix them.

Paper Jams

It can occur in the many corners of the printer. If you cannot see a jam in one place, go to the next place.

Clearing the Jammed Paper from the Input Tray

  • Pull out the input tray and use a flashlight to see any jammed paper.
  • Pull the paper with both hands to avoid tearing it when you find a paper jam.
  • Now, insert the tray.
  • If the paper jam persists, go to the other area.

Clearing Paper Jam from the Ink Cartridge area

  • You open the ink cartridge access area.
  • Clear the paper jam or any object in the cartridge area.
  • Then, close the ink cartridge access door.

Reset the Printer

  • Turn on the printer.
  • Disconnect the power from the printer.
  • Wait for 60 seconds.
  • Reconnect the printer.
  • Try printing. 

Replacing the Ink Cartridge

You can see that your printer does not print. It is time that you replace the ink cartridge.

Here we are to help you:

  • Turn on the printer.
  • Open the ink cartridge access door.
  • Wait until the carriage stops moving.
  • Release the ink cartridge by pressing down its front.
  • Take out the ink cartridge.
  • Replace it with the new ink cartridge.
  • Do this with the other ink cartridges.
  • Make sure that any ink cartridge does not stick out farther.
  • Then, close the ink cartridge access door.
  • Connecting the printer to the wireless network
  • Go to the Printer Control Panel.
  • Select Network.
  • Press OK.
  • Select the wireless settings.
  • Then, select OK.
  • Press the down arrow.
  • Then, select the Wireless Setup Wizard.
  • Press OK.
  • A window screen pops up where you will see a list of available networks.
  • Press the down arrow.
  • Select the network name.
  • Select OK.
  • If you do not find the network name, then you enter your network name manually.
  • Press Done.
  • Then, click OK.
  • Your printer gets connected to the network.
  • Then, enter the WEP or WPA key.
  • Press Done.
  • Then, press OK.
  • Your printer connects to the network.

These printer problems are common and annoying. Almost anyone can encounter these printer problems. 

In Conclusion

We understand the frustration of these common printer problems. It gets annoying when the printer does not print for any reason. 

We cannot avoid printer problems, but we should upgrade ourselves to learn more about the solutions. Printer problems often look complex, but one can resolve them. 

Knowing how to resolve printer problems helps people fix the most common issues, like paper jams, replacing cartridges, and so much more. 

24×7 Printer Support is Right Here

If you have been experiencing common printing issues, 24×7 Printer Support is here to help you. Our technical team has the expertise to resolve the printer queries right here. 

Get support now!

Call Us For Instant Solutions

Don’t Let Printer Problems Hold You Back!

Set Your HP Deskjet 3755 Wireless Printer In Easy Steps

Have you heard of all-in-one printers? 

You may have thought buying a printer would burn your pocket, but you are wrong. However, the most challenging is to find the best all-in-one wireless printers.

The HP Deskjet 3755 Printer is the best to accomplish all tasks at once, including printing, copying, and scanning documents. 

However, 24×7 Printer Support received many calls on setting up the HP Deskjet 3755 wireless printer setup. If you are also googling some easy steps to set up this wireless printer, you have landed on the right pages. You do not have to get yourself entangled in the thick bunch of wires because everything is wireless. 

And why should you keep on reading this? 

Because over here, you will find no complexity. Our blog is an easy walkway to the HP Deskjet 3755 wireless printer setup. 

There is no need to read or learn technical jargon because our solutions are lucid; anyone can understand the steps. The effortless printing with the HP Deskjet 3755 printer is now here.

However, like another printer process, we have received numerous calls about the challenges of the wireless setup. 

Let us begin by telling you that there are various processes to install your HP Deskjet 3755 printer. 

Without further ado, let’s start. 

Simple Instructions for Setting Up the HP Deskjet 3755 Printer on Your OS

Process #1

Follow these step-by-step processes to install HP Deskjet 3755 on your operating system.

#1: Turn on the printer and device.
#2: The configuration of WiFi is the same for the printer and the operating system.
#3: Connect the operating system with the US cable.
#4: Download the printer driver.
#5: After downloading the printer file, install it.
#6: Agree to the terms and conditions.
#7: You need to select the connection mode as a USB cable.
#8: Go to the Control Panel of the system.
#9: Choose Add a Printer from the list. 

Process #2

Next comes another method of installing the HP Deskjet 3755 via WiFi. There is no rocket science in this installation process. We will help you with the process of installing the printer via WiFi. 

#1: This wireless setup process is done seamlessly by using the buttons on the printer.
#2: The users must have access to the wireless network and the router to begin the installation process.
#3: Tap on the wireless button for 3 seconds.
#4: The wireless light flashes out.
#5: Download the printer driver.
#6: Choose the connection method as wireless.
#7: Select the printer machine, and then click on Next.
#8: Fill in the login credentials and select Confirm.
#9: Wait for a while to connect to the WiFi.
#10: Your connection is confirmed. 

(Usually, your screen will display a message of confirmation.)

Installing the printer driver is a cakewalk. 

Follow these:

#1: Go to the official website of HP manufacturers
#2: Select the printer model.
#3: From the section, choose the printer driver option.
#4: Download and install the driver.
#5: Follow the instructions you see on the screen.

And Voila! You have successfully installed the HP Deskjet 3755 printer driver. 

To help you more, we have also compiled a list of ways to help you connect your HP Deskjet 3755 printer to WiFi. Knowing these methods will help you seamlessly connect your printer to the wireless network. 

Here we go.

How do I enable WiFi directly to your HP Deskjet 3755 printer?

  • Go to the Control Panel of your printer
  • Look for the option WiFi Direct 
  • Turn on the WiFi Direct Option

Now, you can connect up to five devices with your activated WiFi Direct. 

What sets the HP Deskjet 3755 apart from other printer models is its ability to handle a moderate workload; do not worry about making your printer tired. It has a duty cycle of 1000 pages. 

Now, let’s learn something different. 

What about checking out the steps for connecting your HP Deskjet 3755 printer to your phone for mobile printing? 

Use the HP Deskjet 3755 Printer to Print a Document From Your Phone

  • Activate WiFi Direct on your phone and printer. 
  • Then, choose the document you want to print. 
  • Next, your mobile will show the list of available printers. 
  • Then, tap on the model (HP Deskjet 3755 Printer).
  • Select ok

Your phone connects to the HP Deskjet 3755 printer. So, enjoy printing!

Summing Up

Let us tell you that you are not alone in facing trouble with the Deskjet 3755 wireless setup. The setup process is simple and gives you numerous benefits, including multiple purposes and flexibility to work with maximum load. This enhanced capacity helps you have a smooth printing experience and makes your task easier. If you are encountering issues with your HP Deskjet 3755 wireless setup, contact the technical team at 24×7 Printer Support. Our technical experts will resolve your issue in no time.

Call Us For Instant Solutions

Don’t Let Printer Problems Hold You Back!

Common HP Officejet Pro 8600 Issue That You Can Resolve

The HP Officejet PRO 8600 is a decent printer choice. So, if you’re searching for an inexpensive printer, this model works well for small businesses. 

However, unlike other printer models, this one faces many technical issues. Therefore, knowing about HP Officejet Pro 8600 troubleshooting is essential and can help you find solutions. 

Today, we’ll look at possible printer problems with the HP Officejet Pro 8600. Don’t stress over fixing these problems. We understand that these problems could irritate you. However, there are simple solutions available.

Without any further ado, let’s dive in. 

Issue #1

Disconnected Network 

Are you using a wireless printer? You may see that the printer is not getting connected to the device. It is frustrating.

It is quite a common problem, almost with every printer. So, don’t worry; this problem has an easy solution.

When you are connecting your printer wireless to the device, there needs to be a strong internet connection. It establishes a strong connection between the printer and the device. Enter your wireless name (SSID) and password (WPA/WEP). Then, go to your printer’s control panel, and click Wireless Setup Wizard. After that, you will get on-screen instructions. Follow these instructions to connect the printer to the device. 

Issue #2

Problem with the Ink System 

Whenever you go to print a document, do you often see this error, “Ink System Failure” Yes, this is another error we have seen among many printer users. There may be several causes such as a damaged printer or a leaking ink cartridge. You don’t need to worry about these printer issues because they have simple fixes.

However, look for leaks in the HP OfficeJet Pro 8600 ink cartridges before proceeding with the solution. Turn on the printer and slide open the ink cartridge’s access door.

But if you see that the ink cartridge is not leaking, something in your printer is not working. 

You need to disconnect the printer from your device and wait a minute. After disconnecting the printer, try to connect the printer to the device again. Then, try printing to check if the device is working.

Issue #3

Paper is Falling Out of the Printer

While printing a document, if you keep seeing that the paper is falling out of the printer, there could be two reasons: the broken output flap and the output tray are not set properly inside the printer.

What is an output flap?

It is a small piece of plastic that keeps the printer papers in place. 

So, if the output flap breaks, the paper keeps sliding off.

There could be another reason behind it. The setting up of the output tray in the printer needs to be corrected. In such a case, you extend the tray to the “legal” position and allow the printer pages to lay flat on the tray. 

Issue #4

The Papers are Not Printed

We understand your frustration when you see that your printer is not printing. It is again the most common issue among all printer users. Whenever you insert a page to print a document, you may notice a blank or unclear page coming out of the printer. 

In such a case, you need to check the page quality first. Getting the right page quality is essential in such a case because it ensures a smooth printing experience. 

In such a case, you need to clean the HP Officejet Pro 8600 printhead to ensure you do not have poor print quality. 

Follow these:

  • Load the unused plain white paper into the main paper input tray. 
  • Go to the Control Panel.
  • Select Setup.
  • Touch the Clean Printhead option. 

When your printhead is clean, you will have a smooth printer experience. Your experience with printing paper is enhanced. 

Issue #5 

Missing or Failed Printhead

Is your printing experience ruined due to a “missing or failed printhead?” Your printer may stop working after showing this error. 

There could be two reasons behind it:

  • Software Issue 
  • Uninstalled Printhead

Due to some software or technical glitch, the error “missing or failed printhead” is showing. 

In this case, you switch off the printer and turn it back on again. 

Even after switching the printer off and on, do you see this error message? If yes, reinstall the printer printhead. 

Wrapping Up

HP Officejet Pro 8600 troubleshooting is easy when you know the appropriate steps. You can not run away from the printer problem. 

However, you can eliminate these printer issues by increasing your knowledge of the proper troubleshooting steps. Are you experiencing any of these common HP Officejet Pro 8600 issues? Speak to the technical team at 24×7 Printer Support. We are here to help you with the steps and resolve your printer queries instantly.

Call Us For Instant Solutions

Don’t Let Printer Problems Hold You Back!

Understanding HP Printer Error Code 0xc19a0020: Ink System Failure

HP printers as everybody knows are known for their high-class printing support. Many homes and offices are using it worldwide. One error code is commonly seen among HP Error Code: 0xc19a0020 – Ink System Failure. Even reliable electronic devices sometimes experience issues; HP printer owners may occasionally run into Error Code 0xc19a0020 which indicates Ink System failure which disrupts printing tasks leading to reduced productivity. With some knowledge of printer mechanics and troubleshooting techniques, you can address Error Code 0xc19a0020 more effectively. If you are constantly tired of this problem, contacting the customer support team for HP printer ink support is always the best choice. This guide will go into its complexities as well as ways of troubleshooting and solving it more effectively.

Understanding Error Code 0xc19a0020

HP printers will encounter an ink system failure if their error code of 0xc19a0020 occurs, which results in poor print quality, streaky output, or printing failure altogether. An ink system provides accurate and consistent printing results via cartridges to printheads; its malfunction can lead to poor quality results or complete printhead malfunction; with both options potentially leading to poor results for printing jobs that rely on them.

Error Code 0xc19a0020 Reasons

An error code of 0xc19a0020 may have multiple sources, so understanding all its potential causes is critical in troubleshooting and restoring printer functionality.

Fallen Ink Levels: Error Code 0xc19a0020 can take place in case the ink levels have fallen. Are you wondering how it matters? Well, it makes the printer unable to recognize or distribute ink. It eventually causes system issues within its system. In case you are willing to prevent this risk of ink leaking out in the future, keeping your eyes on ink levels is mandatory. You should also replace cartridges whenever it’s required.

Print Head Blockages: Over time, printheads could become blocked by dirt, dry ink, or any other particles that block the ink from flowing smoothly between printheads and cartridges, creating printing issues or system malfunction. Regular cleaning could help to prevent these obstacles from recurring which could result in the elimination of Error Code (0xc19a0020)!

Defective cartridges: In certain situations, using incompatible or damaged cartridges could cause an Error Code (0xc19a0020). Genuine HP ink cartridges are crucial for optimal performance and compatibility. They have been specially designed to be compatible with each printer model that is used. Cartridges made by substandard or counterfeit makers may not function properly and could cause problems with printing.

Software issues: Issues in the printing system, or with software conflict may cause errors such as the 0xc19a0020. These errors may result from faulty firmware, drivers that are not compatible, or software-related issues. If you upgrade both, you will be able to ensure the smooth operation of your printer and prevent any errors that could occur in the future.

Mechanical Problems: Mechanical problems within printers, like broken components or internal damage, could cause Error Codes 0xc19a0020 or ink system malfunctions, leading to Error Code errors 0xc19a0020 as well as the system’s ink failing. To fix these issues expert assistance from a technician or replacement of parts could be needed if the issue can’t be solved using standard solutions to troubleshoot; if none of these work, HP Customer Support or an accredited technician may have to be called for additional assistance.

How to Fix Error Code 0xc19a0020

Printer Restart: Sometimes an easy restart of your printer will solve temporary issues. Turn off the printer and wait a couple of minutes before turning it back on.

Check the levels of Ink: Make sure there is enough Ink available in every cartridge before replacing them if needed.

Use the utility software: Conduct cleaning and maintenance on your printer’s print heads that will eliminate any dried ink or obstructions to your printheads.

The Hard Reset: This reset for the printer could assist in removing errors; for further details about this look up either the manual or HP’s website.

Upgrade the firmware: HP provides firmware upgrades for every printer model available on its website. This can aid in resolving compatibility and software problems.

How the Customer Support Team Can Assist

HP’s customer support agents have extensive training in fixing Error Code 0xc19a0020 issues and can offer valuable assistance if you are having difficulty.

HP provides multiple solutions for HP printer ink support for users requiring assistance with their printers.

Online Support: HP provides online users with comprehensive resources for troubleshooting guides, software updates, and technical support services that may assist them in solving printer problems independently. Visit their official website to access this section.

Phone Support: HP offers telephone support to customers experiencing printer issues. Through their website, users can locate the appropriate contact number in their area and speak directly with a representative. Furthermore, this personalized assistance comes from agents with experience in troubleshooting or escalating issues as needed.

Live Chat Support: In some regions of HP’s website, live chat support enables users to interact directly with an agent in real-time, enabling instant help with printer issues by communicating directly with support agents who then offer troubleshooting advice or escalate issues as necessary. Live chat can provide users with immediate communication and immediate assistance, making this service particularly suitable for users who value instant communication and immediate help.

HP offers multiple ways for users to contact support when encountering printer errors such as Error Code 0xc19a0020. These options include online support, telephone support, and live HP support chat – plus self-help materials as well as direct assistance from HP’s support team.

Conclusion

Error code 0xc19a0020: Ink system failure can be an aggravating experience on any HP printer, but with proper troubleshooting and support you can remedy the situation. Recognizing possible causes and applying the solutions provided will quickly get your printer running again – or contact HP customer service if unable to.

Call Us For Instant Solutions

Don’t Let Printer Problems Hold You Back!

HP Printer Error Codes: Understanding and Solutions

Just like; other printers, HP printers also get errors. Imagine you have to get some documents printed, and suddenly, your printer is not working. Your papers get stuck, or you are short of ink. What would you do?

When any error occurs, either the printer or the computer displays it. It gets frustrating when you do not know what these printer error codes mean. These error codes; like ‘0xe0ef0003’, ‘HP printer error code 30,’ HP printer error code 3FO Error,’ and much more, can be quite baffling. So, we are here to help you know the basic error codes.

You get to know what the exact problem is and what the causes are behind showing such errors. Knowing the printer error codes will help you fix HP printers faster. So, sit back and read to get rid of your frustrating error codes.

This blog aims to eliminate the common error with the right solution. In this blog, you get information about the error code and solution.

We have created a list of tables with three columns divided into what the HP printer error code is, the cause of the HP printer error code, and how to fix the HP printer error code. 

Common HP Printer Error Codes: Meaning and Solution

HP Printer Error codeWhat it meansSolution 
HP Printer Error Message 49The printer is unable to act on the command or is not able to process the file because of incompatible firmware or a corrupted file. As many users are sending files at once, one of the files may be corrupted. • Turn off the printer
• Check the printer queue
• Delete the queue
• Turn on the printer
HP Error Code 0xe0ef0003Hard drive issueCorrupted master boot recordReplace the hard drive. Keep a backup of the data on your computer.
HP Printer Error Code 30Printer driver issuesRun printer troubleshooting to detect the problem and fix it.
• Update the printer driver
• Reinstall the USB composite device
• A new hardware wizard pops up
• Set the printer device as Default

Change the security permission
Follow this:
Properties>Security tab>Account>Edit>Choose your account>Full control>Apply>Okay

Other steps:
• Go to the Control
• PanelUninstall the printer device
• Go to HP drivers 
• Remove all HP drivers
• Delink HP printer
• Connect it/Link it again
• Go to the HP website
• Download the latest driver 
Error Code 0x6100004aPaper jams, hardware malfunctioning or low ink cartridgesPaper jams, hardware malfunctioning, or low ink cartridges
3FO Error code • Boot device not found 
• Issue in Hard drive connection
• Wrong boot sequence 
Solution 1
• Run Windows update
• Update all software
• Update all firmware
• Update all drivers

Solution 2
• Perform Hard Reset
• Restore the BIOS default settings
• Run a hard drive test 
Error Code 0XC4EB8004 HW_MICCI2 C• Regular printer usage
• Cartridge issue 
• Malware
• Poor internet connectivity
• Issue with toner ink
Solution 1
• Turn on the printer and take the cord out of the printer  
• Take out the cartridge 
• Restart the system 
• Turn off WiFi 
• Plug in the cable and put the cord back in the printer 
• Insert the cartridge, when asked 
• Turn on the system and the router 
• Make sure that the commands are working okay. 
• Try printing

Solution 2
• Go to troubleshooting settings 
• Select View
• Select Advanced
• Click on Run as Administrator 
• Click on the icon that shows printer 
• Then, select Next 
• Then, follow the on-screen instructions
HP Printer Error Code 79Corrupt print jobsOutdated firmwareSolution 1: Fix corrupt print jobs
• Turn off the printer
• Clear the print queue and cancel all the print jobs
• Restart printer
• Test printing 

Solution 2: Update printer firmware
• Turn off the printer
• Clear the print queue and cancel all the print jobs
• Restart printer
• Go to the Printer Menu
• Click on settings
• Find and select Update
• Download and install the Firmware
• Switch off your printer
• Keep it off for 5 mins
• Then, restart your printer 

These were some of the common HP printer errors that we have come across once in a lifetime while using the printer. These printer issues are not hard to fix when you know what they mean and how to resolve them. 

However, what most people do is either check for paper jams, toner, and ink cartridges or update the firmware. Keeping your printer clean is also essential because dust or a bit of jammed paper can make the HP printer not work properly.

Tips to Maintain Your Printer for Optimal Performance 

Over time, the printer gets clogged and dirty, damaging its functionality. This results in printing issues, a reduced lifespan, or expensive repairs. 

That’s why we have presented a few tips for you to clean your printer. We ensure that by following these tips, you can eliminate half of the printer issues.

If you are using an HP printer for personal work, you can clean it once a month. However, if you are using the printer for official purposes, you can clean it weekly or daily.

Here you go 

  • Use a soft and dry cloth to clean the exterior surface of the printer 
  • Clear the paper tray to get rid of debris or dust
  • Clean the printhead of your printer periodically
  • Unplug or turn off the printer when it is not in use. 
  • Replace the ink or toner cartridges 
  • Avoid using low-quality paper, and don’t overload the paper tray
  • Don’t keep the printer at a very humid or extreme temperature

Now that you know about the common error codes of HP printers, you can fix HP printers easily. However, if you are still facing issues with the common HP printer error codes, get in touch with some online technicians at an affordable rate.

Call Us For Instant Solutions

Don’t Let Printer Problems Hold You Back!